This guide will show step-by-step instructions for setting up email on Outlook 2007 for Windows. While it can be used for other versions of Outlook, some screens and steps might vary.
Have the following details ready before you start:
- Your domain name
- Your email address
- Your email password
Adding a new account:
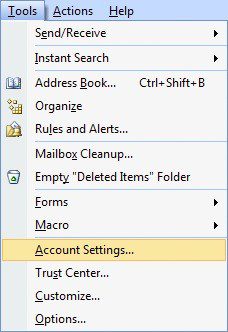
- Select the ‘Tool’ menu.
- Select Account Settings.
- Click the New button.
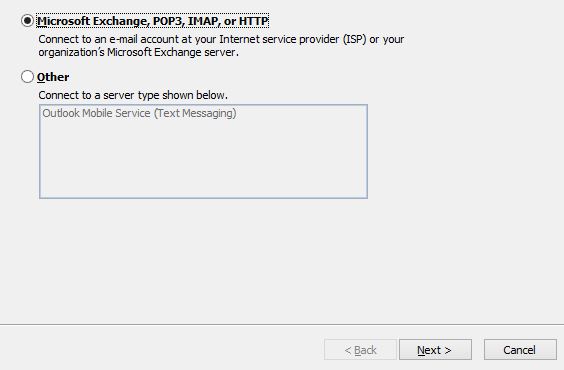
- Choose Microsoft Exchange, POP3, IMAP, or HTTP.
- Click Next.
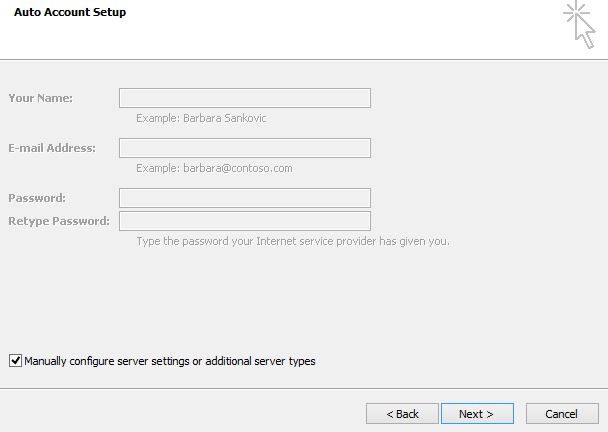
- Choose to Manually configure server settings.
- Click Next
Account Settings
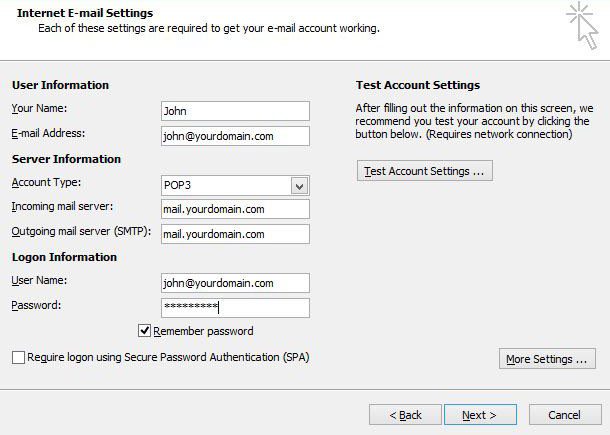
- Enter your name as you want it to appear on your outbound email messages.
- Enter your email address.
- Account type choose POP3
- Enter your full email address as the User Name.
- Enter your email password.
- Your incoming mail server is mail.yourdomain.com replacing yourdomain.com with your own domain url.
- The Outgoing Mail Server is the same as your incoming mail server.
More Settings
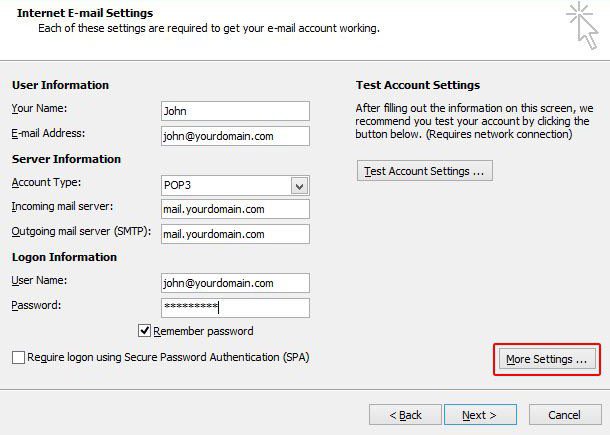
- Click the More Settings button.
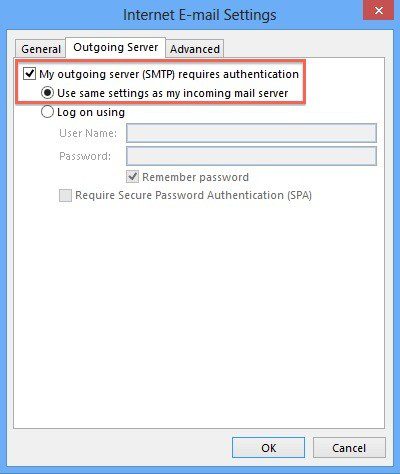
- Click the Outgoing Server tab.
- Check the “My outgoing server (SMTP) requires authentication” checkbox.
- Ensure you are using the same settings as your incoming mail server.
Testing Settings
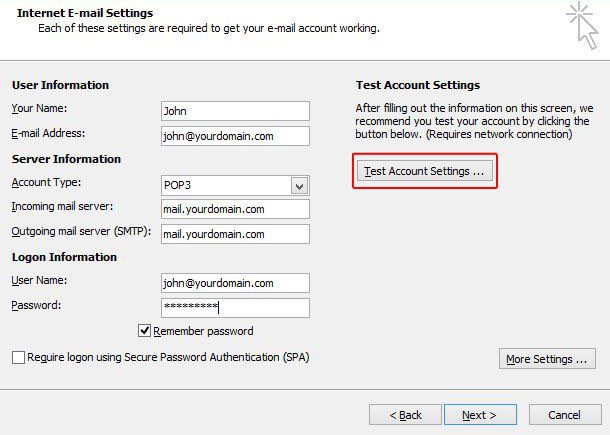
- While on the E-mail Accounts screen, click the Test Account Settings button.
- This will both check your settings and send a test email to yourself to confirm that everything is working. If you receive any errors, please check your configuration.
- Click the Close button on the Test Account Settings window.
- Click Next on the E-mail Accounts window.
- Click the Finish button.
Outlook 2007 is now correctly configured to send and receive emails.


